Tuesday, September 27, 2011

Roasted Veggie Recipes

As promised, here are the two roasted veggie recipes. They use similar ingredients, so I suggest making the two recipes within a few days of each other. Also, I must warn: you may become addicted to roasting vegetables after making these recipes...Enjoy!


Roasted Veggies Mixed With Orzo
Serving size = 1 (but can easily be doubled!)
**also, feel free to use whatever veggies you want. These are just the ones I had on hand. 


Ingredients:
-1 sweet potato
-1/2 medium eggplant
-1/4 cauliflower
-1 small onion
**cut the above ingredients into 1-2 inch pieces
-4 beets, remove greens (save for Roasted Veggies Over Cheesy Polenta recipe) and trim off tops and bottoms so that beets have a flat surface
-3 cloves of garlic, minced & separated (you'll need 2 cloves for roasting and 1 clove raw)
-1/4 cup parsley, coarsely chopped
-2 cups kale, chopped (separate stems & leaves)
-1/4 cup orzo
-1/2 cup canned chickpeas, drained & rinsed
-2 tablespoons olive oil (separated)
-1 tablespoon balsamic vinegar
-1 tablespoon dried herbs of your choice (I used herbs de provence)
-pepper, to taste
-optional: some nice italian cheese (Pecorino Romano, for instance) to grate on top


Directions:
1. Preheat oven to 425 degrees Fahrenheit; place saucepan filled with water on the stove on high heat
2. Combine sweet potato, eggplant, cauliflower, onion, 2 cloves minced garlic, 1 tablespoon olive oil, dried herbs, and pepper in a bowl. Mix well. 
3. Evenly spread veggies on a baking sheet; wrap beets in aluminum foil (like a tent) and place them on the same baking sheet.
5. Place baking sheet in oven for 20-25 minutes (after 10 minutes, check on the veggies, mix them around with a spatula, then let them continue cooking for 10-15 more minutes). 
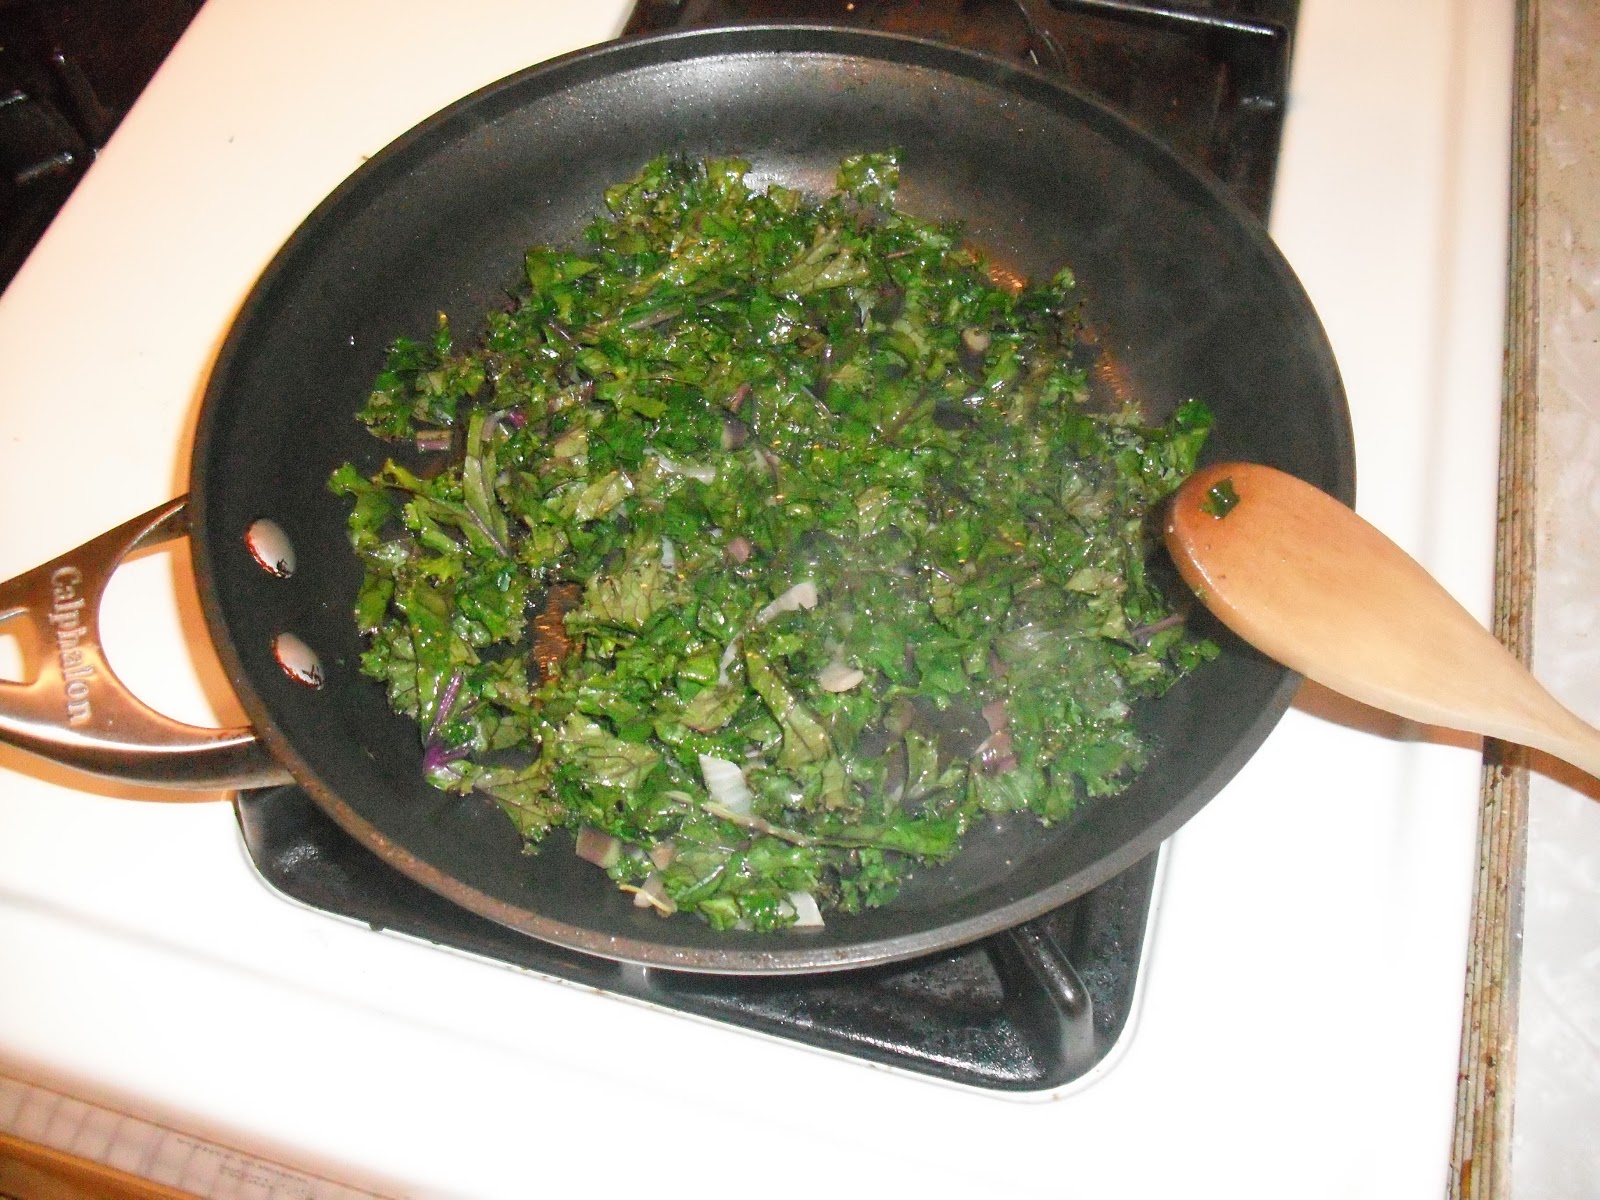
6. Heat sauté pan on stove on medium heat; once the pan is hot, add remaining 1 tablespoon of olive oil 
7. Add kale stems & cook for 2 minutes; then add kale leaves (you may need to do this in batches, depending on the size of your pan)
8. Meanwhile, your saucepan with water should be boiling. Add orzo to water and cook according to package.
9. Remove veggies from oven after 20-25 minutes; carefully remove beets from foil and peel off their skin; chop the beets into 1-inch pieces and combine with the rest of roasted veggies --- you will only use half of this roasted veggie mix. Save the other half for another meal!
10. Drain orzo. Combine 1/2 of roasted veggie mix, sauteed kale, orzo, 1 clove minced garlic, balsamic vinegar, parsley, and chickpeas in a bowl. 
11. Top with grated cheese and serve!


Roasted Veggies Over Cheesy Polenta
Serving Size: 1
Ingredients:
-remaining 1/2 of roasted veggie mix from Roasted Veggies Mixed With Orzo recipe
**if you don't have leftover roasted veggies, you can follow the directions for the above recipe as to how you should roast some veggies!
-2 cups beet greens (or other greens like swiss chard, spinach, kale, etc.)
-1/2 cup canned chickpeas, drained & rinsed
-1/4 cup yellow cornmeal 
-1 cup water 
-2 tablespoons cheese (this time I used crumbled blue cheese, but grated cheddar tastes really good as well!)
-1 tablespoon olive oil
-pepper, to taste


Directions:
1. Heat sauté pan on stove on medium heat; when hot, add olive oil, followed by beet greens
2. Cook greens for 2-3 minutes, until wilted, but still bright green; turn heat to low.
3. Combine cornmeal and water in a saucepan; bring to a boil and then reduce to simmer immediately, stirring the cornmeal constantly until it turns to a thick porridge-like consistency (about 5-10 minutes); this is your polenta.
4. Add cheese to polenta (be sure to keep stirring); add a few grinds of pepper.
5. Once polenta has formed an almost solid consistency, turn the heat off and place a top on the saucepan to keep the polenta warm. 
6. Turn saute pan up to medium-low heat, add chickpeas, and cook for 2 minutes. 
7. Add roasted veggie mix to saute pan and cook for 1-2 minutes, until veggies are heated through
8. Pour polenta into a bowl; top with roasted veggie, beet green, & chickpea mix, and serve! 

BON APPETIT!

Sunday, September 25, 2011

Boastin' About Your Roastin'

It is officially FALL...so you know what that means? Time to roast some veggies!! During the summer it's too hot to turn on the oven, but as soon as that crisp air hits, I'm ready to start roastin' me some veggies. They are one of my FAVORITE things to cook and not just because they taste de-LICIOUS. Roasted veggies are super easy to make, they can be used in/added to basically any recipe, and if you make a big batch of them at the beginning of the week (which I often do), they'll last you through Friday!  


How do you roast veggies? Here's the basic idea: preheat your oven to 400-425 degrees fahrenheit (depending on the strength of your oven). Cut your veggies (whatever veggies you want & however many you feel like!) into 1-2 inch pieces (make sure they're all the same size, otherwise they'll cook at different speeds). Also, mince 2-3 cloves of garlic. Place all the cut vegetables and minced garlic into a bowl, drizzle with 1-2 tablespoons of oil (amount of oil depends on how many veggies you're cooking and either olive or canola oil is fine), and sprinkle 1 teaspoon of ground pepper, plus 1-2 teaspoons of whatever other dried herbs you'd like to add (e.g. dried oregano, basil, cayenne pepper, sage, herbs de provence, rosemary, etc.). Toss the veggies, garlic, oil, and spices together - make sure to coat all the vegetables. Evenly spread the veggies onto a baking sheet (you may need more than one) and place in the oven for 10 minutes. 
After 10 minutes, check on the veggies, using a spatula to toss them around, then continue cooking them for another 10-15 minutes. The veggies are done with they have a crisp (but not burned) look to them and can be easily pierced by a fork.
To store: keep roasted veggies in an air-tight container in your fridge. Whenever you want to use them, just open the container and scoop out the amount you want to use. Simple, easy, delicious...love it!


Last week I made two different meals with a small batch of roasted vegetables. The first was Roasted Veggies mixed with Orzo (I got the idea from a recipe I read in a magazine), the second was Roasted Veggies on top of Cheesy Polenta (a dish I created last winter, that I absolutely love to make and eat). I'll post the recipes (with pictures) tomorrow, but in the meantime, here are some other ideas for how to use your batch of roasted vegetables: 

  • Put them in a sandwich wrap
  • Add them to a salad (with mixed greens or grain-based)
  • Cook them with eggs (great for dinner AND breakfast!)
  • Make them into a casserole (just add some rice, put the whole mix in a casserole dish, top with canned crushed tomatoes & cheese, bake for 15-20 minutes!)
  • Eat them as a side dish with meat/fish
Roasting doesn't take very long (I do it on weeknights all the time); but for those of you with very little time to cook during the week, this is a perfect cooking activity for a Sunday afternoon/evening. Just make yourself a big batch of roasted veggies and enjoy having this tasty treat all week long in any breakfast, lunch, or dinner recipe you want! Trust me, when you start making your veggies this way, I guarantee you'll be boastin' about your roastin'! 

Tuesday, September 20, 2011

Get It? Got It. Good!

As I was walking home from the metro this evening, I began to mentally check off the list of ingredients I'd need to make dinner (this is something I do on a somewhat regular basis, because I'm constantly thinking about the next meal I'm going to make...yes, I am a bit cooking-obsessed, but that's alright, because otherwise I wouldn't be writing this blog!). When I got to "parsley" I had to think long and hard. Do I have parsley? Where in my fridge could it be? Hmmm... 


I consider parsley to be an essential ingredient - something you should always have available in your fridge - which got me thinking...for those of you who don't cook all that often or are just getting started, (and even for those who do cook on a regular basis), it might be useful to give you a list of the top ingredients that I consider "staple pantry & fridge items". These are the things you should always have on hand, because they are used, or at least I use them, quite frequently in the recipes I like to make. Additionally, these "staples" can save your butt on nights when you get home really late, haven't thought at all about dinner, and don't have the mental energy to muster up a creative dish. 


When you have staple items, you are well-equipped to make a wide variety of recipes. So, I gave it some thought, investigated my pantry & fridge, and came up with the following list of ingredients: 
**Note: OBVIOUSLY you need to buy other ingredients to make the majority of recipes I'll be blogging about (like fresh produce, meat, etc.)...if you read on, you'll realize what I mean by "staples"**


Top 25 Ingredients to Keep in Your Fridge/Pantry
1. Garlic -- this is a must. I'm pretty sure I use at least one clove of garlic on a daily basis.
2. Olive Oil -- I prefer extra virgin (it has the strongest taste of all the olive oils and I really like the taste), but if you don't like the taste, or financially you can't afford it, just get some regular olive oil...it functions exactly the same as extra-virgin. 
3. Parsley -- great taste, awesome to add to a salad, and used in almost every Italian dish (at the very least as a garnish)
PAUSE! FYI: During a cooking class I took while studying abroad in Italy, I was told by the woman leading the class that these three ingredients -- garlic, olive oil, and parsley -- are the only three things you need to make any meal taste good. She said that other spices are great, but if all you add to your pasta (or chicken/potatoes/you name it) are those three ingredients, your meal is guaranteed to taste phenomenal. Three years later, I have to say that I 100% agree with her. 
4. Balsamic/Red Wine Vinegar
5. Mustard - preferably dijon, but anything will do. I use mustard predominantly for making salad dressing (it binds the vinegar and oil to make a thicker dressing than just oil and vinegar)
6. Pasta and/or rice - if you're gluten-free, stick with the rice. If you are able to eat gluten, have at least one box of pasta always in the pantry (my favorite shapes are penne and bow-tie) and a bag of rice (brown or white)
7. Canned Beans - dried beans are much cheaper, but the convenience of opening up a can of beans and not having to worry about soaking the beans overnight/waiting forever for them to cook, outweighs the cost (at least for me, at this point in my life). And honestly, canned beans aren't that expensive anyways - like $0.89! Just make sure to rinse and drain the beans in a colander before using - this gets rid of almost 40% of the added salt (and when possible, buy "no salt added" or "low-sodium" cans)
8. Canned Tomatoes - diced, crushed, whole-peeled...it's up to you. I usually have one can of each. 
9. Lemons - great for seasoning, plus you can use the peel!
10. Honey 
11. Flour - if you have to choose one, go with unbleached all-purpose because it can be used in way more recipes; but if you have the luxury of enough pantry/fridge space, I recommend a bag of both (that way you have the option of making certain dishes half whole-grain - - especially when baking!)
12. Canola Oil - you'll use it in baking, as well as for stir-frys 
13. Sugar - I use brown sugar as much as granulated, so I'd recommend a small bag of each
14. Onions/scallions - after garlic, these are the best ingredients for flavoring & spicing up a dish!
15. Ginger - super cheap, stores well, and adds delicious flavor (especially to asian dishes)
16. Baking soda 
17. Baking powder - if you're going to bake AT ALL, then baking powder and baking soda are MUST-HAVES
18. Dried fruit - raisins first, then get fancy (dried cranberries, apricots, figs)
19. Tortillas - again, if you can eat gluten then go whole-wheat; if you can't have gluten then get some brown rice tortillas instead. Tortillas are great for lunches and also quick dinner ideas. 
20. Eggs - need 'em for a lot of baking recipes, but also delicious as breakfast, brunch, or a quick dinner
21. Cheese - at the very least have some sort of Italian cheese available for topping your dishes (Pecorino-Romano tastes similar to Parmesan, but is WAY cheaper!); if you want to get sassy, buy some cheddar (great for melting), feta, gorgonzola, or goat cheese - all these are great for incorporating into dishes 
22. Butter - I don't actually use butter all that often, but there are certain baking recipes that need it, and since it has such a long shelf life you might as well invest in some butter and keep it in your freezer/fridge
23. Nuts - these can be expensive (I've found that price-wise, Trader Joe's is the cheapest), so I would start by getting walnuts and almonds. If you're willing to invest, get some pecans, pistachios, hazelnuts, or sunflower seeds. Be sure to keep 'em in your freezer and they'll be good for months!
24. Peanut Butter - sometimes I make asian dishes that use PB, but it's also a fantastic go-to item for quick lunches (PB & J...classic) and tastes delicious with apples and bananas for a healthy snack. If you're allergic to nuts, try sunflower seed butter.
25. Salt & Pepper - I don't salt my food too often (I prefer adding a touch of cheese for that salty flavor), but as I learned in Italy, pasta tastes the BEST when it is cooked in water that tastes like the ocean; so for that reason alone, make sure you have a good supply of salt. And pepper is like the color black - it pretty much goes with everything - so make sure you have some.  


There you have it. Obviously there are some ingredients that are more necessary than others, and it is completely up to you what gets stocked in your kitchen. For example: if you plan on NEVER baking, then you don't really need to get baking powder or baking soda. If you're allergic to gluten, nuts, or are lactose-intolerant, then obviously don't purchase items you won't be able to ingest. And I'm not saying go out and stock up on all of these items RIGHT NOW. Your kitchen is an investment - gradually accumulate the items you feel are necessary to have in your kitchen. Having a well-stocked pantry/fridge makes cooking much more fun, relaxing, and convenient. If you're prepared to cook, then nothing can stop you. 


As the title of this posts suggests, with regard to your staples: Get it? Got It. Good! 

Sunday, September 18, 2011

Ricotta Gnocchi: So Easy and So Delicious

The morning of Saturday, September 17th, I found myself with 16 ounces of part-skim ricotta cheese in the fridge, with an expiration date of...Saturday, September 17th. Uh-oh. What do you do with 2 cups of ricotta cheese? Make ricotta gnocchi, of course! This is a super easy, super healthy, super delicious, all around super recipe (it's a slightly tweaked version of one of my work's recipes). I made a double batch (obviously, because I needed to get rid of my ricotta cheese STAT) and it yielded 175 gnocchi - yes, I counted every individual piece of gnocchi...I wanted to be able to report exactly how much gnocchi you can expect from this recipe (that's how much I love you all).  So, here's what you need: 

Ricotta Gnocchi
Ingredients
-1 egg
-1 cup part-skim ricotta cheese
-1/2 cup whole-wheat flour
-1/2 cup all-purpose flour
-optional: 1/2 teaspoon ground nutmeg

And here's what you do: 
Directions
1. Put a large pot of water on the stove and bring it to a boil (this can occur while you're making the gnocchi dough)
2. Crack egg into medium-size bowl and beat with a fork (or whisk, if you're savvy like that)
3. Add ricotta cheese, both flours, and nutmeg (if using). Mix together until sticky dough forms. 
4. Divide dough into 6-7 logs. 
5. Lightly flour a cutting board, as well as your hands, and proceed to roll out each log (one at a time) into a thinner log (about 12-14 inches in width), using a back-and-forth motion. Add flour to the cutting board if the dough starts sticking (the dough is rather sticky, so it will definitely stick to your hands; but if you keep flouring your hands, that will reduce the amount of dough that sticks to you). 
6. Cut each log into 1/2 inch wide pieces (these are your gnocchi).
7. Your water should be boiling by now, so drop the individual gnocchi into the water (be careful of splashing yourself with scalding hot water!) - I'd recommend batches of 10 gnocchi at a time.
8. When the gnocchi start to float (after 30-40 seconds), remove gnocchi from water using a slotted spoon or spatula, and place them into a colander to drain.
9. Voila! You made gnocchi! According to my calculations you should have approximately 87-88 gnocchi (you don't actually need to count). Now what do you do with them? 

I ended up giving about half of my double batch to one of my bitches and I froze almost all of the rest. I kept 3/4 cup of gnocchi in my fridge, so that I could make some for dinner tonight. I created a rather tasty dish using some leftover pesto I had in my freezer, as well as some kale and an heirloom tomato from the farmer's market. Here's one way to use your gnocchi: 

Ricotta Gnocchi with Pesto (served over Sauteed Kale and Tomato)
Serving Size: 1 person (though you could easily double this recipe for more people)
Ingredients
-1 tomato, of any kind, sliced or diced however you'd like
 (you could use 1 cup of cherry/grape tomatoes, in which case you'd want to slice them in half or quarters)
-3-4 cups of kale leaves & stems, roughly chopped (make sure to separate the leaves from the stems and to keep them in different piles)
*you can easily substitute for whatever type of greens you like (ex: spinach, swiss chard)*
-1/4 cup onion, sliced or diced (it's up to you... tonight I sliced)
-1-2 garlic cloves, minced (if you're not kissing anyone when you make this, I'd advocate for 2 cloves)
-1 heaping tablespoon of pesto, store bought or homemade (recipe to come at some point)
-3/4 cup of Ricotta Gnocchi
-2 tablespoons of olive oil, divided
-salt and pepper to taste
-optional: 2 tablespoons mozzarella cheese
Directions: 
1. Place sauté pan on stove, over medium heat 
2. Pour 1 tablespoon of olive oil into pan (once the pan is hot), followed by the onions and kale stems; cook for 5 minutes
3. Add the kale leaves to onion & stem mixture (depending on the size of your pan, you may need to do this in batches - wait for some of the kale to cook down before adding more) and cook until wilted
4. Add tomatoes and reduce heat to low; season with pepper and stir
5. Heat another sauté pan on medium heat, and once it's hot, add your remaining 1 tablespoon of olive oil
6. Sautee garlic for approximately 30-40 seconds (do not let garlic burn), then add your Ricotta Gnocchi
7. Heat your gnocchi until they start to brown on both sides (3-5 minutes)
8. Once browned, add your heaping tablespoon of pesto and mix, making sure to cover all of gnocchi in pesto; add mozzarella (if using)
9. Pour kale & tomato mixture into a bowl/on a plate and top with gnocchi & pesto mix. Add salt and pepper to taste. 

Bon Appétit! Let me know if you try this recipe (or if you do something else with the Ricotta Gnocchi). 

Thursday, September 15, 2011

Eating Healthy Basics 101

What does a typical day of eating "healthy" look like? Hmm, good question... and one I'm sure many people ask on a daily basis. Should I be eating this? What about that? I'm not a registered dietician (yet), so at the moment I can't give you the nitty-gritty details about the vitamins, minerals, and nutrients in all the food you're eating - not that you really want to know or even care. But I do have a lot of experience with food and nutrition (I work for a cooking-based nutrition education program, so my daily interactions are between chefs and nutritionists), so I can give you some very knowledgeable advice.

Let's start with the basics: 
1. Does it grow from the ground or up in a tree? Then eat it up! You've heard it before, but seriously, vegetables, fruits, grains, beans, nuts, and legumes - these are the foods you want to be eating the most of, and I'm talkin' at least 70% of your daily intake.  High in vitamins & fiber, low in calories (aside from the nuts) & fat (FYI veggies and fruits don't actually have any fat - the only exceptions are coconuts and avocados, but we can get into that detail at another time)...this is the type of food your body wants and needs. Eat more of these foods and I guarantee you'll feel the difference in your body's happiness.

2. Does it come from an animal? These are the foods that you want to eat in moderation. Why? Because animal products have a lot of cholesterol and fat (predominantly saturated fat - again, we can get into details on fats later) and although your body definitely needs fat, you can get fat from healthier sources (best example: OLIVE OIL!). Don't get me wrong, I LOVE cheese, but it's not really something you should be eating in big portions, on a daily basis. So, when it comes to dairy products, choose low-fat or non-fat options when possible. Some low/non-fat dairy products taste incredibly similar to (or the same as) their full-fat counterparts (example: I personally taste no difference between low-fat and full-fat cottage cheese); but, there are definitely some things that just don't taste the same if they aren't full-fat (example: non-fat feta cheese tastes super gross...regular feta is like sex in your mouth), so just be sure to limit those full-fat products to once a week in small portions. You don't have to give up the regular feta to be healthy...just don't eat it every day in huge chunks for lunch and dinner. As for meat, if you're going to eat it, then choose lean cuts of poultry, try to eat fish that are low in mercury, make your weekend omelet two-eggs instead of three (or better yet, one egg + one egg white), and save the red meats (burgers, steaks, ground beef) for special occasions...like, once or twice a month. I'm not hating on animal products...I just don't want you to have a heart-attack. 

3. What about dessert?! The worst thing you can do is deprive yourself of sweets, because you are guaranteed to lose your will-power at some point and then completely binge on every sugary thing in sight (FYI - this is not good). And don't "save dessert for the weekends". Hello?! The weekdays are the days you need some sort of pick-me-up the most! Make yourself a hump-day bowl of ice cream and congratulate yourself on making it through half of the work week. Your mind and body will be thankful for the treat. 

4. And soda? I'm totally biased on this subject... sodas creep me out, mostly because you can't read half of the things listed on the ingredient label - why would you want to put a science experiment inside your body? I'm a huge advocate of good old-fashioned water. And if water's too boring for you, try seltzer water (the carbonation gives it some pizazz). And if seltzer water is still too boring for you (geez, tough crowd), then add a few drops of fruit juice (the program I work for makes this mixture all the time... we call it a "fruit soda"). Still not satisfied? Try some tea or coffee. As long as you're not adding 5 packets of sugar and half a cup of cream, tea and coffee will keep you hydrated the same as water. 

5. Does size matter? Yes, and unfortunately controlling our portions can be very difficult in today's society...have you been to the Cheesecake Factory lately? Have you SEEN the size of their plates?! You want to make sure you're eating enough, but not too much (ambiguous enough for you?). I'll get into portion control techniques at some point, I'm sure, but for now all you need to know is this: your fist = one cup, your palm = 3 ounces of meat, the tip of your thumb to the knuckle = 1 tablespoon. Look at food labels to understand what an appropriate serving size should be, and use your hands to approximate. 

This is a lot of information, I know. Your eyes are probably glazed over. You didn't actually read half of what I wrote. That's okay though - read and reread this entry until you fully comprehend the knowledge I have imparted on you. Then, reflect on your own diet - how you eat and what you eat - and think if there's anything you can change or improve upon to make you a healthier eater. No need to thank me now. I've changed your life, but no big deal. Just keep reading - that's all the thanks I need. 

Tuesday, September 13, 2011

Why Bitches and Brunching?

You may be asking yourself the following questions: why use the term "bitches"? and what's so special about brunch? Here is my answer: 


What is a bitch? The dictionary definition of a bitch is: 1. a female dog, wolf, fox, or otter (who knew?). 2. [informal derogatory] a woman whom one dislikes or considers to be malicious or unpleasant. 


My definition of a bitch is: an assertive, authoritative, intellectually creative, sarcastically funny, kick-ass woman who many men (and sometimes women) find to be intimidating. I chose to empower the word bitch by using it in the title of this blog. If you've ever been called a bitch (I have! multiple times in fact), then take it as a compliment. It means you're just too much for the simple-minded and submissive people of the world to handle.


Why brunch? Breakfast AND lunch...come on, pure genius. Brunch is by far the most superior meal of them all. It is the perfect combination of sweet, salty, and savory foods. Bake a batch of muffins, scramble some eggs with onions, peppers & cheese, serve it all with a fresh fruit salad and voila! a delicious (and healthy!) brunch. There's nothing like getting together with a group of friends (side note: all my friends are bitches, I don't know about yours) at 11am on a Sunday, giving each other life updates and sharing ridiculous stories. And let's not forget that brunch-time is pretty much the only time when it is considered acceptable (at least in the US) to start drinking before noon. Mimosas at 10am? Sure, why not! Now do you understand why I chose brunch?


But, even though the title of this blog is Brunch for Bitches that does NOT mean I'm only going to write about recipes pertaining to brunch (however all the recipes DO pertain to bitches...and non-bitches, for those of you reading). The point of the blog is simply this: to give helpful and healthful tips for buying, cooking & eating food (including healthy recipes), as well as my two-sense on how to live a healthier life. 


Bon appetit to Brunch for Bitches!